- 1 What is Malware? Classification, Characteristics, and Prevention
- 2 What is DDoS? Signs, Response and Effective Prevention Methods
- 3 What is Phishing? Recognizing and Preventing Online Fraud
- 4 What is DNS Sinkhole? Applications and How to Use DNS Sinkhole Technique
- 5 What is OAuth 2.0? Authorization and Login with Google/GitHub
- 6 What is a Trojan? Essential Information About Trojan Malware
- 7 What Is Zero Trust? The 'Never Trust, Always Verify' Security Model
- 8 What is VPN? Virtual Private Network, WireGuard and OpenVPN
- 9 What Is MFA? Multi-Factor Authentication vs 2FA Explained
- 10 What is a Firewall? Role and Functions in Network Security
- 11 What is SQL Injection? Database Attacks and Prevention
- 12 What is XSS? Cross-Site Scripting Attacks and Prevention
OAuth 2.0 is an open authorization protocol (RFC 6749) that lets third-party applications access a user's resources on another service without knowing their password. It is the foundation of "Sign in with Google", "Login with GitHub", and countless API integrations used by billions of people every day.
Need data solutions for your business?
AlgoData has helped businesses with data engineering, analytics & AI since 2019.
In this article, we will explore how OAuth 2.0 works, distinguish authorization from authentication, walk through every step of the Authorization Code Flow, and understand why PKCE is essential for SPAs and mobile apps. By the end, you will know exactly what happens under the hood every time you click "Sign in with Google".
What is OAuth 2.0? Authorization vs Authentication
First, let us clear up two concepts that are commonly confused: authentication and authorization.
- Authentication answers the question "Who are you?" — it verifies identity. When you enter a password, the system authenticates that you are the account owner.
- Authorization answers the question "What are you allowed to do?" — it grants or restricts access after identity has been established.
OAuth 2.0 is an authorization protocol, not an authentication protocol. It solves the problem: how can an application (say, Canva) access your Google Drive without you handing over your Google password?
Consider a practical analogy: when you park at an upscale restaurant, the valet is given a valet key — a special key that only allows starting the engine and parking, not opening the glove box or the trunk. That is exactly how OAuth 2.0 works: instead of giving Canva full control over your Google account, you issue it a digital "valet key" — an access token — scoped only to reading Drive files, unable to read Gmail or change your password.
The OAuth 2.0 standard is defined in RFC 6749 (published October 2012) by the IETF. It is a full replacement for OAuth 1.0, simplifying the protocol and adding support for a wider range of client types.
Key properties of OAuth 2.0:
- Applications receive a time-limited access token, never the password.
- Users control scopes — the specific list of granted permissions.
- Tokens can be revoked at any time without changing the password.
- Supports multiple client types: web apps, mobile apps, SPAs, IoT devices.
The 4 Roles in OAuth 2.0
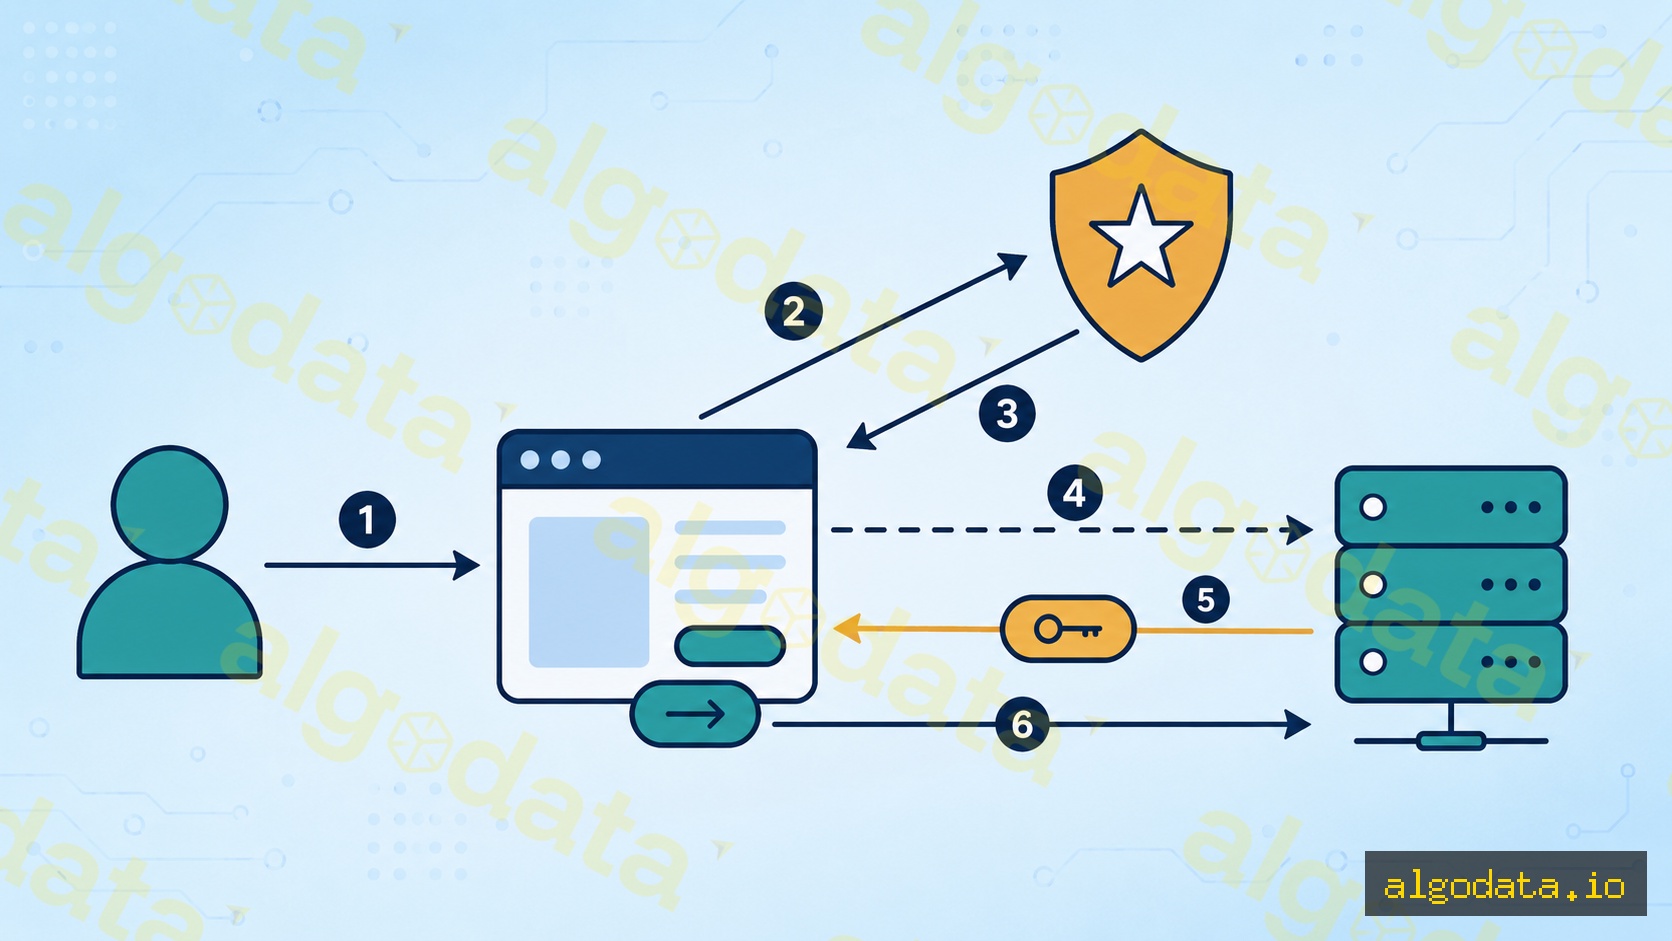
RFC 6749 defines four roles in a complete OAuth 2.0 flow. Understanding these roles clarifies who does what throughout the entire process.
1. Resource Owner
The Resource Owner is the end user — the entity that owns the resource and can grant access to it. In the "Canva accesses Google Drive" example, the Resource Owner is you — the person with the Google account who owns the Drive files.
The Resource Owner is not always a human. In machine-to-machine flows (Client Credentials), the Resource Owner and the Client may be the same entity.
2. Client
The Client is the application requesting access to the resource on behalf of the Resource Owner. In our example, Canva is the Client. The Client must register with the Authorization Server in advance to receive a client_id and client_secret.
There are two types of Clients:
- Confidential client: A web app running on a server that can keep
client_secretsecure. - Public client: An SPA (React, Vue) or mobile app — cannot store secrets safely because the code runs on the user's device. Must use PKCE.
3. Authorization Server
The Authorization Server is the service that issues tokens after verifying the Resource Owner's identity and obtaining their consent. Google, GitHub, Facebook, and Microsoft each operate their own Authorization Servers.
The Authorization Server exposes two main endpoints:
- Authorization Endpoint (
/auth): receives the authorization request, displays the consent screen, returns an authorization code. - Token Endpoint (
/token): receives the authorization code, validates the Client, returns an access token and refresh token.
4. Resource Server
The Resource Server is the API that holds the data the Client wants to access. It accepts the access token in the request header, validates it, and returns data if the token is valid and has the required scopes.
In practice, the Authorization Server and Resource Server are often deployed together (e.g., accounts.google.com issues tokens, www.googleapis.com is the Resource Server), but RFC 6749 separates them conceptually.
Authorization Code Flow — Step by Step
Authorization Code Flow is the most widely used grant type, recommended for web apps and mobile apps. It is the most secure flow because the access token never passes through the browser.
1. User clicks "Login with Google" in the App
2. App redirects → https://accounts.google.com/o/oauth2/auth
       ?client_id=APP_CLIENT_ID
       &redirect_uri=https://myapp.com/callback
       &response_type=code
       &scope=openid email profile
       &state=RANDOM_CSRF_TOKEN

3. User logs in and consents → Google redirects back to:
       https://myapp.com/callback?code=AUTH_CODE&state=TOKEN

4. App backend POSTs to Google:
       https://oauth2.googleapis.com/token
       client_id, client_secret, code, redirect_uri, grant_type=authorization_code

5. Google responds with:
       { access_token, expires_in, refresh_token, id_token }

6. App calls the API:
       GET https://www.googleapis.com/oauth2/v3/userinfo
       Authorization: Bearer ACCESS_TOKEN
Breaking down each step:
Steps 1–2: Authorization Request The app constructs a redirect URL with these parameters:
client_id: the app identifier registered with Google.redirect_uri: the URL Google will redirect back to after user consent (must match the registered URI exactly).response_type=code: specifies the Authorization Code Flow.scope: the list of permissions being requested.state: a random nonce to prevent CSRF — the app must verify this value when it receives the callback.
Step 3: Authorization Code
After the user logs in and consents on Google's consent screen, Google redirects back to redirect_uri with a code — an authorization code that lives for roughly 10 seconds and can only be used once. This is a critical security property: the short-lived, single-use code prevents replay attacks.
Step 4: Token Exchange
The app backend (not the browser!) sends a POST request to Google's Token Endpoint, including the client_secret. This exchange happens directly between servers over HTTPS, never through the browser — which is why the access token never appears in browser history or logs.
Step 5: Token Response Google returns:
access_token: the token used to call APIs, typically expiring in 1 hour.expires_in: seconds until expiry.refresh_token: a long-lived token used to obtain a new access token without user interaction (only issued whenoffline_accessscope is requested).id_token: a JWT containing user identity claims (only present when using OIDC with theopenidscope).
Step 6: API Call
The app includes the access token in the Authorization: Bearer <token> header when calling the Resource Server. This is the standard Bearer Token syntax defined in RFC 6750.
Grant Types
OAuth 2.0 defines multiple grant types for different use cases. Each grant type is designed for a specific kind of client and scenario.
Authorization Code (Recommended)
As described above, this is the most secure grant type for:
- Web apps (confidential clients): use
client_secreton the server. - SPAs and mobile apps (public clients): use PKCE instead of
client_secret.
Client Credentials
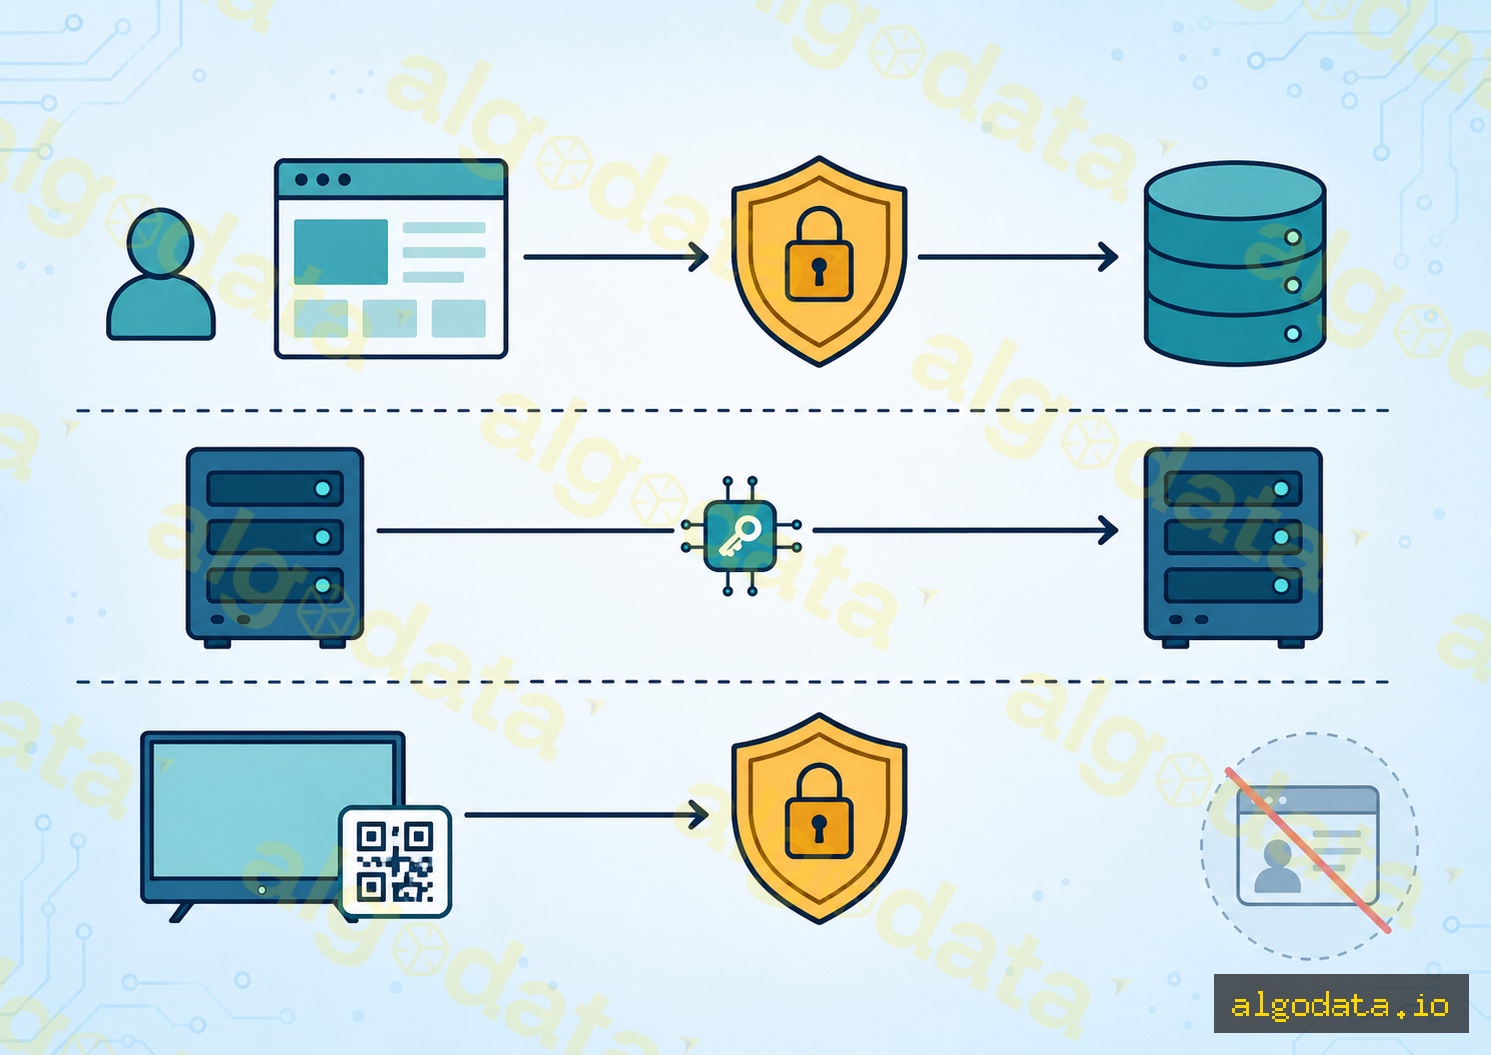
Used for machine-to-machine (M2M) flows — when no human user is involved. For example, microservice A needs to call microservice B's API.
POST /token
grant_type=client_credentials
client_id=SERVICE_A_ID
client_secret=SERVICE_A_SECRET
scope=read:orders write:inventory
Service A authenticates itself with client_id + client_secret and receives an access token directly, with no consent screen involved.
Device Authorization Grant (Device Code)
Used for devices without a browser or with limited input: Smart TVs, game consoles, IoT devices, CLI tools. The device displays a short URL and a verification code; the user enters the URL on their phone or computer, logs in and consents; the device polls the Authorization Server until it receives a token.
Implicit Flow (Deprecated)
Implicit Flow was once used for SPAs before CORS became widely supported. It returned the access token directly in the URL fragment, skipping the code exchange step — convenient but insecure (token exposed in browser history, referrer headers). Implicit Flow is no longer recommended; OAuth 2.1 (draft) removes it entirely. Use Authorization Code + PKCE for SPAs.
OAuth 2.0 vs OpenID Connect (OIDC)
This is one of the most misunderstood aspects of OAuth 2.0: when you "Sign in with Google", you are not using OAuth 2.0 alone — you are using OpenID Connect (OIDC).
Pure OAuth 2.0 solves the authorization problem: granting an app permission to access resources. It does not provide a standard mechanism for answering "who is this user?" An OAuth 2.0 access token is an opaque string — the Resource Server knows the token is valid, but without additional information, it does not know which user it belongs to.
OpenID Connect (OIDC) is an authentication layer built on top of OAuth 2.0, specified by the OpenID Foundation. OIDC adds:
-
ID Token: A JWT returned alongside the access token, containing
sub(subject/user ID),name,email,picture, and other user identity claims. The Client can read the ID Token without an extra API call. -
/userinfoEndpoint: A standardized Resource Server endpoint — call it with an access token to retrieve user information as JSON. -
openidScope: A special scope that activates OIDC. When the authorization request includesscope=openid, the Authorization Server returns an ID Token. -
Discovery Document: The
/.well-known/openid-configurationendpoint returns JSON describing all endpoints, supported scopes, and signing keys — clients can auto-configure without hardcoding URLs.
In summary:
- OAuth 2.0: "Canva is allowed to read my Google Drive."
- OIDC: "I am John Smith, email j@gmail.com — here is Google's cryptographic signature confirming that."
Most major identity providers (Google, GitHub, Microsoft, Apple) implement both OAuth 2.0 and OIDC on the same endpoint. Adding openid to the scope switches you into OIDC mode.
Common Security Mistakes
Implementing OAuth 2.0 incorrectly can introduce serious vulnerabilities. Here are the most common mistakes:
1. Not Validating redirect_uri — Authorization Code Hijacking
This is the most dangerous vulnerability. If the Authorization Server does not strictly validate redirect_uri, an attacker can:
- Craft a link with
redirect_uri=https://attacker.com/steal. - Send the link to a victim.
- The victim logs in; the authorization code is delivered to
attacker.com. - The attacker exchanges the code for an access token.
Prevention rules:
- Exact match against the registered URI — no wildcards, no new subdomains.
- Never prefix-only checking (
https://myapp.comis not safe if an attacker useshttps://myapp.com.evil.com). - Reject any URI not present in the whitelist.
2. Ignoring the state Parameter — CSRF Attack
The state parameter is a random nonce created by the client, sent in the authorization request, and verified on callback. If the app does not use or verify state:
- Attacker crafts their own authorization request and obtains an authorization code.
- Attacker embeds the code in a page and tricks the victim into visiting it.
- The victim's app automatically exchanges the attacker's code, binding the attacker's account to the victim's session.
Always generate a fresh state for each authorization request, store it in the session, and verify it in the callback before exchanging the code.
3. Access Tokens in URLs — Log Leakage
The deprecated Implicit Flow and some careless implementations place access tokens in URL fragments or query strings. Tokens in URLs can leak through:
- Browser history.
- The
Refererheader when the browser navigates elsewhere. - Server access logs.
- Proxy logs.
Always transmit tokens in the Authorization: Bearer header, never in the URL.
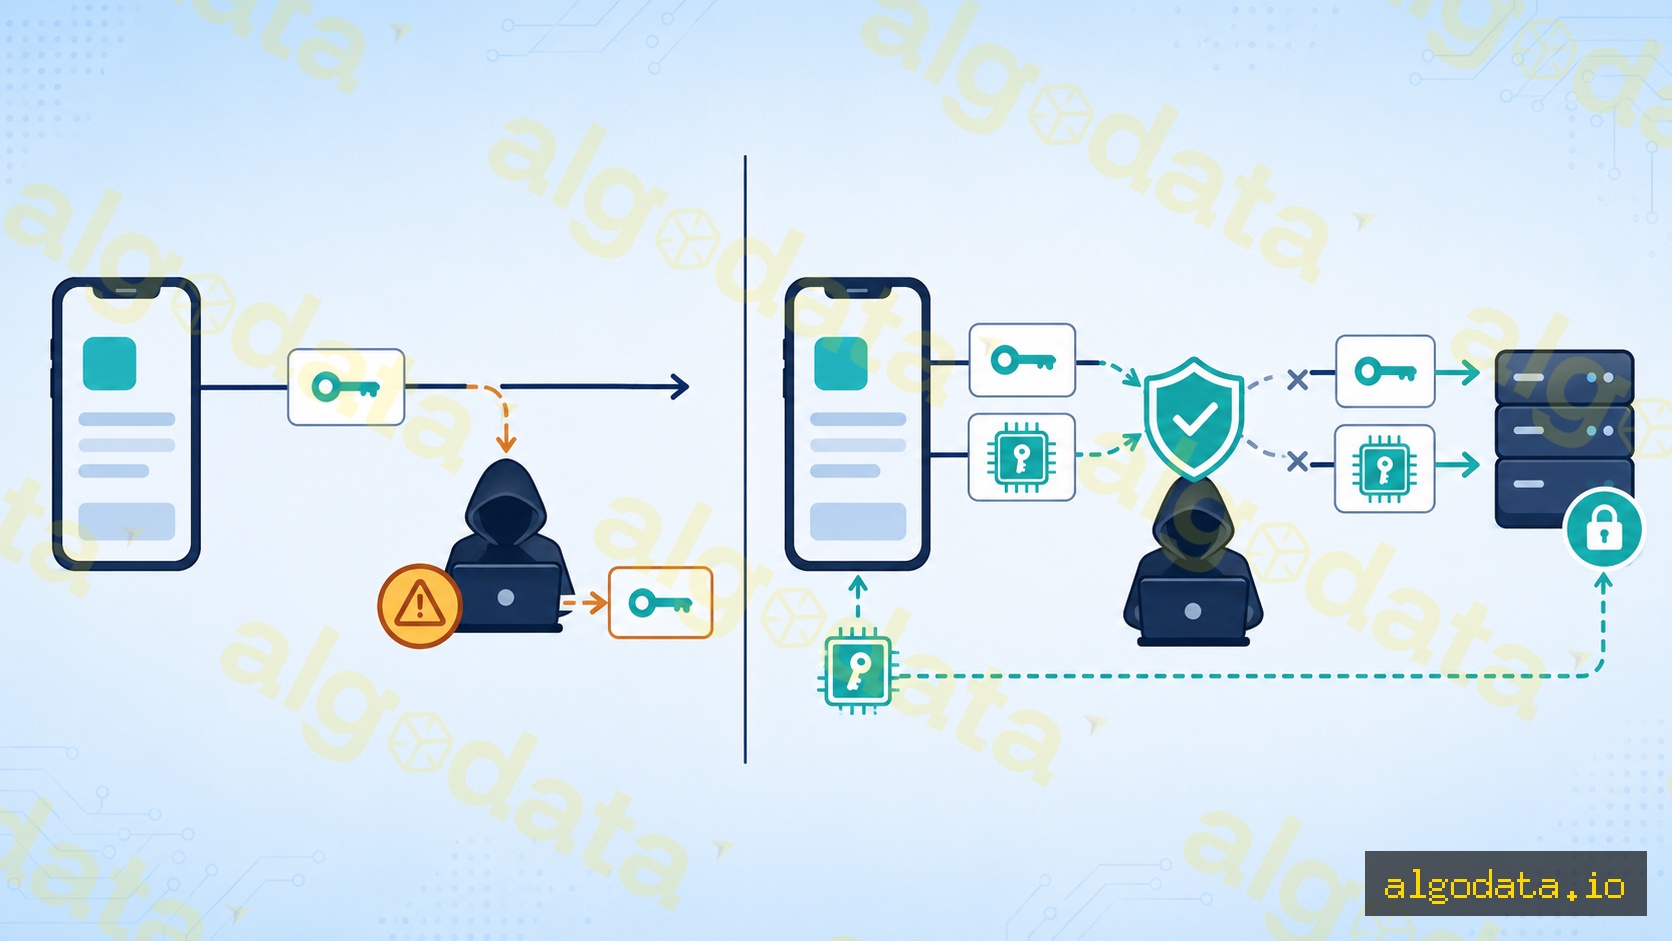
4. Not Using PKCE for SPAs and Mobile Apps
Public clients (SPAs, mobile) cannot protect a client_secret. Without PKCE, an intercepted authorization code can be exchanged for a token by any app that knows the client_id (which is public).
PKCE for SPAs and Mobile Apps
PKCE (Proof Key for Code Exchange, RFC 7636) solves this problem. The idea: instead of a static client_secret, each authorization request generates a random code_verifier and a code_challenge that is a hash of it.
 1// SPA — PKCE flow (Web Crypto API)
 2async function generatePKCE() {
 3  const array = new Uint8Array(32);
 4  crypto.getRandomValues(array);
 5  const verifier = btoa(String.fromCharCode(...array))
 6    .replace(/\+/g, '-').replace(/\//g, '_').replace(/=/g, '');
 7  const encoder = new TextEncoder();
 8  const data = encoder.encode(verifier);
 9  const digest = await crypto.subtle.digest('SHA-256', data);
10  const challenge = btoa(String.fromCharCode(...new Uint8Array(digest)))
11    .replace(/\+/g, '-').replace(/\//g, '_').replace(/=/g, '');
12  return { verifier, challenge };
13}
The PKCE flow:
- The SPA generates a
code_verifier(a random string of 43–128 characters). - The SPA hashes
code_verifierusing SHA-256 →code_challenge. - The SPA sends
code_challenge(not the verifier!) with the authorization request. - The Authorization Server stores the
code_challenge. - When the SPA exchanges the code for a token, it sends the original
code_verifier. - The Authorization Server hashes
code_verifierand compares it to the storedcode_challenge— they match only if the request came from the same client that initiated the flow.
If an attacker intercepts the authorization code, they do not have code_verifier → they cannot exchange it for a token. PKCE turns each authorization request into a one-time keypair bound to a specific client instance.
As of OAuth 2.1 (draft), PKCE is mandatory for all Authorization Code Flows, including confidential clients.
Summary
OAuth 2.0 is the backbone of the modern API ecosystem. Keep these key points in mind:
- OAuth 2.0 is authorization, not authentication — use OIDC when you need "Sign in with Google".
- 4 roles: Resource Owner (user), Client (app), Authorization Server (Google/GitHub), Resource Server (API).
- Authorization Code Flow is the recommended flow — short-lived code, token exchanged server-to-server.
- PKCE is mandatory for SPAs and mobile — no
client_secret, use a one-time verifier/challenge pair instead. - Scopes enforce least privilege — only request what you actually need.
- Validate
redirect_uristrictly, always usestate, never put tokens in URLs.