What is WampServer? A Complete Overview of WampServer Software
Development

What is WampServer? A Complete Overview of WampServer Software

Learn what WampServer is, how to install Apache, MySQL, PHP on Windows. Compare WampServer with XAMPP, MAMP, LAMP and a guide to installing WordPress on localhost.

✦ Quick summary
Learn what WampServer is, how to install Apache, MySQL, PHP on Windows. Compare WampServer with XAMPP, MAMP, LAMP and a guide to installing WordPress on localhost.
How was this post?

WampServer is a free software bundle that integrates Apache, MySQL, and PHP on Windows, helping you create a local server environment for web development. This article covers installation, comparisons with XAMPP/MAMP/LAMP, and how to install WordPress on localhost.

What is WampServer?

WampServer is a free and open-source software package that allows users to create a server environment on their personal computer, specifically designed for web developers. The "W" in the name stands for the Windows operating system, followed by Apache (web server), MySQL (database management system), and PHP (programming language).

Thanks to the integration of these three key components, WampServer simplifies the web application development process. Users can run PHP applications on their own computer without having to configure each piece of software individually. In particular, Wamp also provides a user-friendly interface that makes managing and testing projects easier than ever.

Key Components of WampServer

WampServer consists of several supporting components, the most notable being:

  • Apache: A web server responsible for receiving requests from browsers and returning content to users. It supports multiple programming languages and provides extensible functionality.
  • MySQL: A relational database management system (RDBMS) that helps store and manage data for web applications. Users can easily create and query data tables.
  • PHP: A popular scripting language for web development that supports dynamic data processing and database interaction.

In addition, WampServer comes with tools such as phpMyAdmin — which allows managing MySQL databases through a graphical interface — and XDebug — a tool for debugging PHP code.

Benefits of WampServer

Using WampServer offers many significant benefits for web developers, especially beginners. Key highlights include:
List of 27 most commonly used free proxies today

Easy to Install and Use

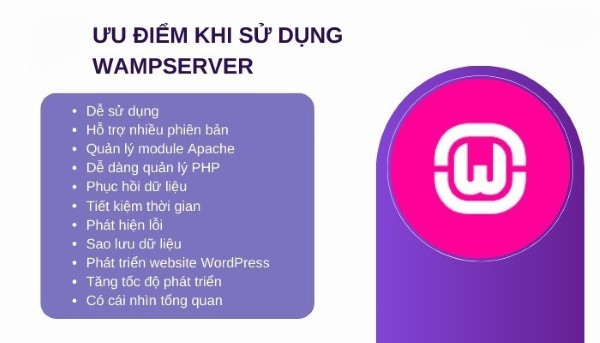
One of the greatest advantages of Wamp is its easy and quick installation process. Simply download the WampServer package, follow the on-screen instructions, and you'll have a complete development environment set up. There's no need to delve deeply into configuring individual software like Apache or MySQL — Wamp handles everything automatically.

Comprehensive Development Environment

WampServer provides all the necessary components for web application development, from the web server to the database and programming language. This helps developers save time and optimize their workflow.

Free and Open Source

Unlike many commercial software products, WampServer is a free and open-source product. This not only saves you money but also provides high customizability, allowing you to adjust it to your project's specific needs.

Regular Updates

WampServer regularly receives updates to improve performance and patch security vulnerabilities. This continuous support ensures that your development environment remains stable and secure.

Large Community Support

With a large user community, you can easily find documentation, tutorials, and support forums when encountering difficulties. This helps you quickly resolve issues during usage.

Comparing WampServer, XAMPP, MAMP, and LAMP

When it comes to web development tools, WampServer is not the only option. Along with WampServer, there are other software solutions such as XAMPP, MAMP, and LAMP. Comparing these tools will help you choose the software that best suits your needs.

WampServer
As mentioned, WampServer is a tool exclusively for Windows users. It provides an intuitive and easy-to-use interface, making it an ideal choice for those who want to develop web applications quickly and efficiently.

XAMPP
XAMPP is a cross-platform package, meaning you can use it on Windows, macOS, and Linux. This is a significant advantage if you work across multiple operating systems. However, XAMPP can be more complex to configure and install compared to WampServer.

MAMP
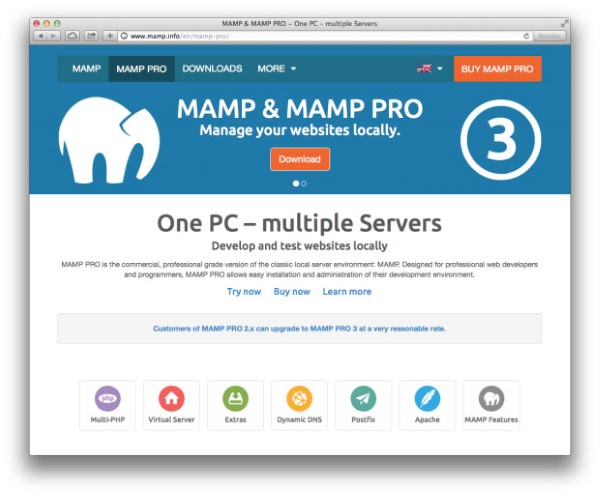
MAMP is a similar solution to WampServer but designed for macOS users. MAMP offers two versions: a free version and a Pro version with more extended features. If you're a developer working on a Mac, MAMP may be a better choice for you.

LAMP
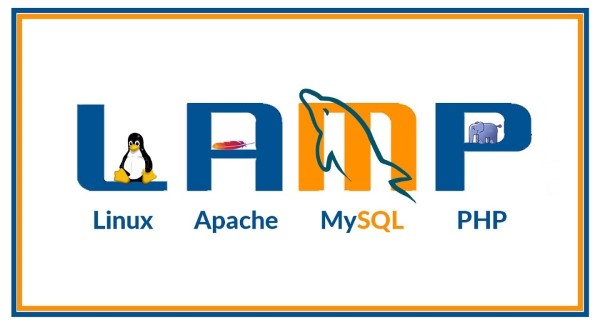
LAMP is an open-source technology stack consisting of Linux, Apache, MySQL, and PHP. It's the preferred choice for those developing web applications on servers running the Linux operating system. However, LAMP requires more technical knowledge since you need to manually install each component.

Should You Choose WampServer or XAMPP?

Choosing between WampServer and XAMPP depends on several factors, including the operating system you're using, your specific needs, and your level of experience in web development.
What is a Port? Guide to Checking Ports on Windows

WampServer Features

  • Easy installation: WampServer allows you to install quickly without having to go through many complex steps.
  • User-friendly interface: The easy-to-use user interface helps you manage server components efficiently.
  • Integrated phpMyAdmin: This tool allows you to manage MySQL databases visually.

Advantages of WampServer

  • Quick installation time.
  • Good compatibility with PHP applications.
  • Strong community support.

Disadvantages of WampServer

  • Not supported on non-Windows systems.
  • Lacks some advanced features that XAMPP or MAMP have.

XAMPP Features

  • Cross-platform: XAMPP works on multiple operating systems, including Windows, macOS, and Linux.
  • Multiple integrated tools: In addition to Apache, MySQL, and PHP, XAMPP also provides additional utilities such as FileZilla FTP Server, Mercury Mail Server, and Perl.

Advantages of XAMPP

  • High cross-platform capability.
  • Many useful additional tools for application development.

Disadvantages of XAMPP

  • May take time to get familiar with its interface and how it works.
  • Many features can be confusing for beginners.

Choosing Between WampServer and XAMPP

If you only work on Windows and need a simple tool, WampServer will be the better choice. Conversely, if you need to work across multiple operating systems or require many supporting tools, XAMPP will be the more suitable option.

Detailed WampServer Installation Guide

Installing WampServer is very simple and easy. Below is a detailed step-by-step guide.
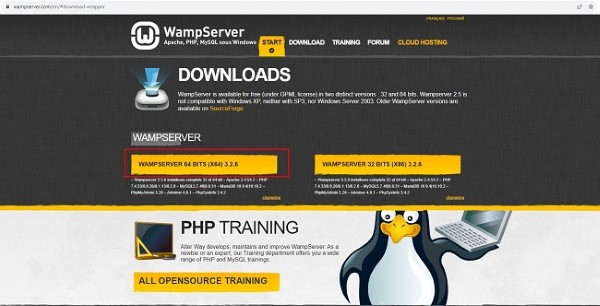
Step 1: Download WampServer Visit the official WampServer website at wampserver.com and download the version that matches your Windows operating system. You can choose between the 32-bit or 64-bit version depending on your computer configuration.

Step 2: Install WampServer After downloading, open the installation file and follow the on-screen instructions. You'll be asked to choose an installation directory and accept the terms of use. Make sure you have admin privileges to complete the installation process.

Step 3: Start WampServer After installation is complete, the WampServer icon will appear in the system tray. Click on this icon to start the program. Once again, check that all services such as Apache and MySQL are running.

Step 4: Verify the Installation Open a web browser and navigate to http://localhost or http://127.0.0.1. If you see the WampServer homepage displayed, that means you've installed it successfully.

Basic WampServer Usage Guide

Using WampServer is fairly simple, but you need to understand some basic operations to manage your development environment.
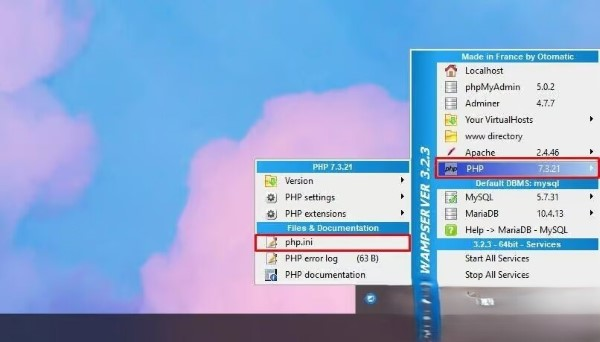
Checking Server Status

The WampServer icon in the system tray will change color to indicate the server status. Green means everything is running normally, while orange or red may indicate issues. You can right-click the icon to view detailed information.

What is a Datacenter Proxy? Comparing Residential Proxy and Datacenter Proxy

Configuring PHP

WampServer allows you to easily configure PHP parameters by accessing the php.ini file. Here, you can change settings such as maximum execution time, upload size, and many other parameters.

Accessing the Main Menu

Right-click the WampServer icon in the system tray to access the main menu. Here, you'll find options such as starting or stopping services, accessing phpMyAdmin, and opening the localhost homepage.

Configuring Apache

You can access the Apache configuration file (httpd.conf) to change the default port, add modules, or change the website root directory. This allows you to customize the server to your specific needs.

Shutting Down WampServer

When you've finished your development work, you can shut down WampServer by right-clicking the icon and selecting "Exit." This will stop all running services on the server.

Installing WordPress on Localhost with WampServer

WordPress is one of the most popular content management systems today. Below is a guide to installing WordPress on localhost using WampServer.
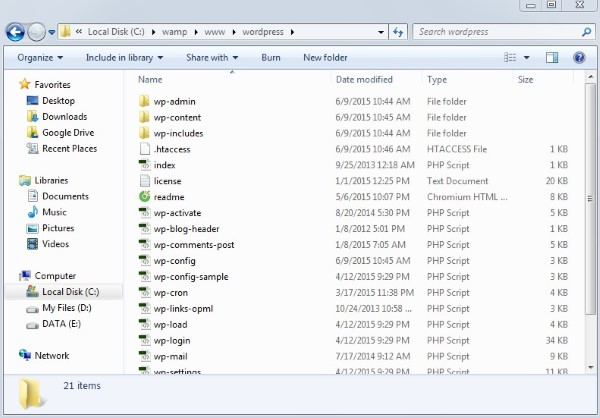
Step 1: Download WordPress Visit the official WordPress website at wordpress.org and download the latest version. After downloading, you'll have a zip file containing the WordPress source code.

Step 2: Extract the File Extract the downloaded file to the www directory within the WampServer installation folder. Typically, the path will be C:\wamp\www. You can name this folder "wordpress" or any other name you prefer.

Step 3: Rename the Source Folder If you want to access WordPress via http://localhost/wordpress, make sure the folder you just extracted is named "wordpress."

Step 4: Create a Database in PHPMyAdmin Open phpMyAdmin by navigating to http://localhost/phpmyadmin. Log in with the username "root" (default has no password). Create a new database, for example "wordpress_db".

Step 5: Complete the Installation Open your browser and navigate to http://localhost/wordpress. Follow the on-screen instructions to complete the WordPress installation. Enter the database information you created in the previous step and finish the setup.

{{< test-result title="Comparison of local web development tool stacks" headers="Criteria|WampServer|XAMPP|MAMP|LAMP" row1="Operating system|Windows|Windows, Mac, Linux|Mac (Windows)|Linux" row2="Web server|Apache|Apache|Apache, Nginx|Apache" row3="Database|MySQL|MySQL, MariaDB|MySQL|MySQL" row4="Language|PHP|PHP, Perl|PHP|PHP" row5="Interface|Tray icon, simple|Control panel|GUI|Command line" row6="Price|Free|Free|Free / Pro ($)|Free" />}}

Tip

WampServer is the best choice for beginners on Windows thanks to its simple interface. If you need cross-platform support, choose XAMPP. On Mac, use MAMP. On Linux servers, install LAMP manually.

Conclusion: WampServer is a free toolkit, easy to install, integrating Apache, MySQL, and PHP on Windows. It is the ideal choice for web developers, especially beginners, to create a local development environment and test applications before deploying to a production server.
Sources

Frequently Asked Questions

Frequently Asked QuestionsQ&A

WampServer là bộ phần mềm miễn phí tích hợp Apache, MySQL và PHP trên Windows, giúp tạo môi trường server cục bộ cho phát triển web. Bài viết hướng dẫn cài đặt, so sánh với XAMPP/MAMP/LAMP và cách cài WordPress trên localhost.

WampServer là gì?

WampServer là một gói phần mềm miễn phí và mã nguồn mở cho phép người dùng tạo ra một môi trường server trên máy tính cá nhân, đặc biệt dành cho các lập trình viên web. Chữ "W" trong tên gọi đại diện cho hệ điều hành Windows, tiếp theo là Apache (web server), MySQL (hệ quản trị cơ sở dữ liệu) và PHP (ngôn ngữ lập trình).

Nhờ vào sự tích hợp của ba thành phần quan trọng này, WampServer giúp đơn giản hóa quá trình phát triển ứng dụng web. Người dùng có thể chạy các ứng dụng PHP trên máy tính của chính mình mà không cần phải cấu hình từng phần mềm riêng lẻ. Đặc biệt, Wamp còn cung cấp một giao diện thân thiện với người dùng, giúp việc quản lý và kiểm tra dự án trở nên dễ dàng hơn bao giờ hết.

Các thành phần chính của WampServer

WampServer bao gồm nhiều thành phần bổ trợ, trong đó đáng chú ý nhất là:

  • Apache: Là một máy chủ web có nhiệm vụ nhận yêu cầu từ trình duyệt và trả về nội dung cho người dùng. Nó hỗ trợ nhiều ngôn ngữ lập trình khác nhau và cung cấp các chức năng mở rộng.
  • MySQL: Là hệ quản trị cơ sở dữ liệu quan hệ (RDBMS) giúp lưu trữ và quản lý dữ liệu cho ứng dụng web. Người dùng có thể tạo và truy vấn bảng dữ liệu dễ dàng.
  • PHP: Ngôn ngữ kịch bản phổ biến cho phát triển web, hỗ trợ xử lý dữ liệu động và tương tác với cơ sở dữ liệu.

Ngoài ra, WampServer còn đi kèm với các công cụ như phpMyAdmin – cho phép quản lý cơ sở dữ liệu MySQL qua giao diện đồ họa – và XDebug – một công cụ giúp gỡ lỗi mã PHP.

Các lợi ích của WampServer

Sử dụng WampServer mang lại nhiều lợi ích to lớn cho các lập trình viên web, đặc biệt là những người mới bắt đầu. Những điểm nổi bật bao gồm:

Dễ dàng cài đặt và sử dụng

Một trong những ưu điểm lớn nhất của Wamp là quy trình cài đặt dễ dàng và nhanh chóng. Chỉ cần tải xuống gói WampServer, làm theo hướng dẫn trên màn hình, bạn đã có thể thiết lập được một môi trường phát triển hoàn chỉnh. Không cần phải tìm hiểu sâu về cách cấu hình từng phần mềm như Apache hay MySQL, Wamp sẽ tự động lo liệu tất cả.

Môi trường phát triển toàn diện

WampServer cung cấp đầy đủ các thành phần cần thiết để phát triển ứng dụng web, từ máy chủ web đến cơ sở dữ liệu và ngôn ngữ lập trình. Điều này giúp các lập trình viên tiết kiệm thời gian và tối ưu hóa quy trình làm việc.

Miễn phí và mã nguồn mở

Khác với nhiều phần mềm thương mại, WampServer là một sản phẩm miễn phí và mã nguồn mở. Điều này không chỉ giúp bạn tiết kiệm chi phí mà còn mang đến khả năng tùy chỉnh rất cao, cho phép bạn điều chỉnh nó theo nhu cầu riêng của dự án.

Cập nhật thường xuyên

WampServer thường xuyên nhận được các bản cập nhật nhằm cải thiện hiệu suất cũng như vá lỗi bảo mật. Sự hỗ trợ liên tục này giúp đảm bảo rằng môi trường phát triển của bạn luôn ổn định và an toàn.

Hỗ trợ cộng đồng lớn

Với một cộng đồng người dùng đông đảo, bạn sẽ dễ dàng tìm thấy tài liệu, hướng dẫn và diễn đàn hỗ trợ khi gặp khó khăn. Từ đó, bạn có thể giải quyết nhanh chóng các vấn đề trong quá trình sử dụng.

So sánh giữa WampServer, XAMPP, MAMP và LAMP

Khi nhắc đến các công cụ phát triển web, WampServer không phải là lựa chọn duy nhất. Cùng với WampServer, còn có các phần mềm khác như XAMPP, MAMP và LAMP. Việc so sánh các công cụ này sẽ giúp bạn lựa chọn được phần mềm phù hợp nhất với nhu cầu của mình.

WampServer

Như đã đề cập, WampServer là một công cụ dành riêng cho người dùng Windows. Nó cung cấp một giao diện trực quan và dễ sử dụng, khiến nó trở thành lựa chọn lý tưởng cho những ai muốn phát triển ứng dụng web một cách nhanh chóng và hiệu quả.

XAMPP

XAMPP là một gói đa nền tảng, nghĩa là bạn có thể sử dụng nó trên Windows, macOS và Linux. Đây là một ưu điểm lớn nếu bạn đang làm việc trên nhiều hệ điều hành khác nhau. Tuy nhiên, XAMPP có thể phức tạp hơn trong quá trình cấu hình và cài đặt so với WampServer.

MAMP

MAMP là giải pháp tương tự như WampServer nhưng dành cho người dùng macOS. MAMP cung cấp hai phiên bản: phiên bản miễn phí và phiên bản Pro với nhiều tính năng mở rộng hơn. Nếu bạn là một lập trình viên làm việc trên máy Mac, MAMP có thể là lựa chọn tốt hơn cho bạn.

LAMP

LAMP là một bộ công nghệ mã nguồn mở bao gồm Linux, Apache, MySQL và PHP. Đây là lựa chọn ưu tiên cho những ai phát triển ứng dụng web trên server chạy hệ điều hành Linux. Tuy nhiên, LAMP đòi hỏi kiến thức kỹ thuật cao hơn vì bạn cần phải tự tay cài đặt từng thành phần.

Nên chọn WampServer hay XAMPP?

Việc lựa chọn giữa WampServer và XAMPP phụ thuộc vào nhiều yếu tố, bao gồm hệ điều hành bạn đang sử dụng, nhu cầu cụ thể của bạn và mức độ kinh nghiệm của bạn trong việc phát triển web.

Port là gì? Hướng dẫn kiểm tra Port trên Windows

Tính năng của WampServer

  • Dễ dàng cài đặt: WampServer cho phép bạn cài đặt một cách nhanh chóng mà không cần phải thực hiện nhiều bước phức tạp.
  • Giao diện thân thiện: Giao diện người dùng dễ sử dụng giúp bạn quản lý các thành phần của server một cách hiệu quả.
  • Tích hợp phpMyAdmin: Công cụ này cho phép bạn quản lý cơ sở dữ liệu MySQL một cách trực quan.

Ưu điểm của WampServer

  • Thời gian cài đặt nhanh chóng.
  • Khả năng tương thích tốt với các ứng dụng PHP.
  • Cộng đồng hỗ trợ mạnh mẽ.

Nhược điểm của WampServer

  • Không hỗ trợ trên các hệ thống không phải Windows.
  • Thiếu một số tính năng nâng cao mà XAMPP hoặc MAMP có.

Tính năng của XAMPP

  • Đa nền tảng: XAMPP hoạt động trên nhiều hệ điều hành, bao gồm Windows, macOS và Linux.
  • Tích hợp nhiều công cụ: Ngoài Apache, MySQL và PHP, XAMPP còn cung cấp các tiện ích bổ sung như FileZilla FTP Server, Mercury Mail Server và Perl.

Ưu điểm của XAMPP

  • Khả năng đa nền tảng cao.
  • Nhiều công cụ bổ sung hữu ích cho phát triển ứng dụng.

Nhược điểm của XAMPP

  • Có thể mất thời gian để làm quen với giao diện và cách thức hoạt động của nó.
  • Nhiều tính năng có thể gây rối cho người mới bắt đầu.

Lựa chọn giữa WampServer và XAMPP

Nếu bạn chỉ làm việc trên Windows và cần một công cụ đơn giản, WampServer sẽ là lựa chọn tốt hơn. Ngược lại, nếu bạn cần làm việc trên nhiều hệ điều hành hoặc cần nhiều công cụ hỗ trợ, XAMPP sẽ là sự lựa chọn hợp lý hơn.

Hướng dẫn cài đặt WampServer chi tiết

Cài đặt WampServer rất đơn giản và dễ dàng. Dưới đây là hướng dẫn chi tiết từng bước.

Bước 1: Tải WampServer Truy cập vào trang web chính thức của WampServer tại wampserver.com và tải xuống phiên bản phù hợp với hệ điều hành Windows của bạn. Bạn có thể chọn phiên bản 32-bit hoặc 64-bit tùy thuộc vào cấu hình máy tính.

Bước 2: Cài đặt WampServer Sau khi tải xong, mở file cài đặt và làm theo hướng dẫn trên màn hình. Bạn sẽ được yêu cầu chọn thư mục cài đặt và chấp nhận các điều khoản sử dụng. Hãy chắc chắn rằng bạn có quyền admin để thực hiện quá trình cài đặt.

Bước 3: Khởi động WampServer Sau khi cài đặt hoàn tất, biểu tượng WampServer sẽ xuất hiện trong khay hệ thống. Click vào biểu tượng này để khởi động chương trình. Một lần nữa, hãy kiểm tra xem tất cả các dịch vụ như Apache và MySQL có đang chạy hay không.

Bước 4: Kiểm tra cài đặt Mở trình duyệt web và truy cập vào địa chỉ http://localhost hoặc http://127.0.0.1. Nếu bạn thấy trang chủ của WampServer hiển thị, điều đó có nghĩa là bạn đã cài đặt thành công.

Hướng dẫn sử dụng cơ bản WampServer

Sử dụng WampServer khá đơn giản, nhưng bạn cần nắm rõ một số thao tác cơ bản để quản lý môi trường phát triển của mình.

Kiểm tra trạng thái của máy chủ

Biểu tượng WampServer trong khay hệ thống sẽ thay đổi màu sắc để cho biết trạng thái của máy chủ. Màu xanh lá cây nghĩa là mọi thứ đang hoạt động bình thường, trong khi màu cam hoặc đỏ có thể cho thấy có vấn đề xảy ra. Bạn có thể click chuột phải vào biểu tượng để xem thông tin chi tiết.

Cấu hình PHP

WampServer cho phép bạn dễ dàng cấu hình các tham số của PHP bằng cách truy cập vào file php.ini. Tại đây, bạn có thể thay đổi các thiết lập như thời gian chạy tối đa, kích thước upload, và nhiều tham số khác.

Truy cập vào Menu chính

Bấm chuột phải vào biểu tượng WampServer trong khay hệ thống để truy cập vào menu chính. Tại đây, bạn sẽ tìm thấy các tùy chọn như khởi động hoặc dừng dịch vụ, truy cập phpMyAdmin, và mở trang chủ của localhost.

Cấu hình Apache

Bạn có thể truy cập vào file cấu hình của Apache (httpd.conf) để thay đổi cổng mặc định, thêm module hoặc thay đổi thư mục gốc của website. Điều này cho phép bạn tùy biến máy chủ theo nhu cầu cụ thể của mình.

Tắt WampServer

Khi bạn hoàn thành công việc phát triển, bạn có thể tắt WampServer bằng cách click chuột phải vào biểu tượng và chọn "Exit." Điều này sẽ dừng tất cả các dịch vụ đang chạy trên máy chủ.

Cài đặt WordPress trên Localhost bằng WampServer

WordPress là một trong những hệ thống quản lý nội dung phổ biến nhất hiện nay. Dưới đây là hướng dẫn cài đặt WordPress trên localhost bằng WampServer.

Bước 1: Tải WordPress
Truy cập vào trang chính của WordPress tại wordpress.org và tải xuống phiên bản mới nhất. Sau khi tải xong, bạn sẽ có một tập tin zip chứa mã nguồn WordPress.

Bước 2: Giải nén tập tin
Giải nén tập tin vừa tải về vào thư mục www trong thư mục cài đặt WampServer. Thông thường, đường dẫn sẽ là C:\wamp\www. Bạn có thể đặt tên thư mục này là "wordpress" hoặc tên khác mà bạn muốn.

Bước 3: Đổi tên thư mục mã nguồn
Nếu bạn muốn truy cập WordPress thông qua địa chỉ http://localhost/wordpress, hãy chắc chắn rằng thư mục bạn vừa giải nén có tên là "wordpress."

Bước 4: Tạo cơ sở dữ liệu trong PHPMyAdmin
Mở phpMyAdmin bằng cách truy cập http://localhost/phpmyadmin. Đăng nhập bằng username là "root" (mặc định không có password). Tạo một cơ sở dữ liệu mới, ví dụ như "wordpress_db".

Bước 5: Thực hiện cài đặt
Mở trình duyệt và truy cập vào địa chỉ http://localhost/wordpress. Làm theo các hướng dẫn trên màn hình để hoàn tất việc cài đặt WordPress. Điền thông tin cơ sở dữ liệu mà bạn đã tạo ở bước trước và hoàn tất cài đặt.

{{< test-result title="So sanh cac bo cong cu phat trien web cuc bo" headers="Tieu chi|WampServer|XAMPP|MAMP|LAMP" row1="He dieu hanh|Windows|Windows, Mac, Linux|Mac (Windows)|Linux" row2="Web server|Apache|Apache|Apache, Nginx|Apache" row3="Database|MySQL|MySQL, MariaDB|MySQL|MySQL" row4="Ngon ngu|PHP|PHP, Perl|PHP|PHP" row5="Giao dien|Tray icon, don gian|Control panel|Giao dien do hoa|Command line" row6="Gia|Mien phi|Mien phi|Free / Pro ($)|Mien phi" />}}

Mẹo hay

WampServer la lua chon tot nhat cho nguoi moi bat dau tren Windows nho giao dien don gian. Neu can da nen tang, hay chon XAMPP. Tren Mac, dung MAMP. Tren server Linux, cai LAMP thu cong.

Ket luan: WampServer la bo cong cu mien phi, de cai dat, tich hop Apache, MySQL va PHP tren Windows. Day la lua chon ly tuong cho lap trinh vien web, dac biet nguoi moi, de tao moi truong phat trien cuc bo va thu nghiem ung dung truoc khi deploy len server that.

Nguồn tham khảo
Câu hỏi thường gặpQ&A
WampServer là gì?
WampServer là bộ phần mềm miễn phí, mã nguồn mở, tích hợp Apache, MySQL và PHP trên Windows. WampServer giúp lập trình viên tạo môi trường server cục bộ (localhost) để phát triển và thử nghiệm ứng dụng web.
WampServer khác XAMPP như thế nào?
WampServer chỉ hỗ trợ Windows với giao diện đơn giản, dễ dùng. XAMPP đa nền tảng (Windows, Mac, Linux) và tích hợp thêm FileZilla FTP, Mercury Mail, Perl. WampServer phù hợp người mới, XAMPP linh hoạt hơn.
WAMP viết tắt của gì?
WAMP là viết tắt của Windows, Apache, MySQL, PHP — bốn thành phần chính trong bộ phần mềm. W = hệ điều hành Windows, A = web server Apache, M = database MySQL, P = ngôn ngữ PHP.
WampServer có miễn phí không?
Có, WampServer hoàn toàn miễn phí và mã nguồn mở. Bạn tải từ trang chính thức wampserver.com mà không mất phí. Tất cả thành phần (Apache, MySQL, PHP, phpMyAdmin) đều miễn phí.
Cách cài WordPress trên WampServer?
Tải WordPress từ wordpress.org, giải nén vào thư mục C:\wamp\www. Tạo database mới trong phpMyAdmin (localhost/phpmyadmin). Truy cập localhost/wordpress trên trình duyệt và làm theo hướng dẫn cài đặt.